

By Jim Hingst
Jim Hingst offers tips on removing vinyl graphics to save time and improve job profitability.
The process of removing vinyl films generally requires the
use of both heat and chemicals. Some removers contain hazardous chemicals,
such as toluene, that can cause health problems. Before using any chemical remover, read the
manufacturer’s MSDS sheet and instruction bulletin. Always wear the recommended
safety equipment.
When working with propane torches or heat guns, use
caution. Heat sources can raise the
temperature of the substrate hot enough to blister or burn your fingers. Careless use of heat sources can also cause
fires and explosions.
Removing graphics is unpredictable. Film from the same
roll of vinyl, applied to different substrates will remove with various degrees
of difficulty. A variety of factors
determine how easily graphics can be removed. These factors include the age of
the graphic and the substrate’s condition at the time of application.
Adhesion increases with time making removals
increasingly difficult the longer that a graphic is on the substrate. Graphics
applied to newer and smoother factory-paint finishes remove more easily, than
those applied to old, pitted surfaces. A rough finish provides the adhesive
with a greater total surface area for a stronger adhesive bond.
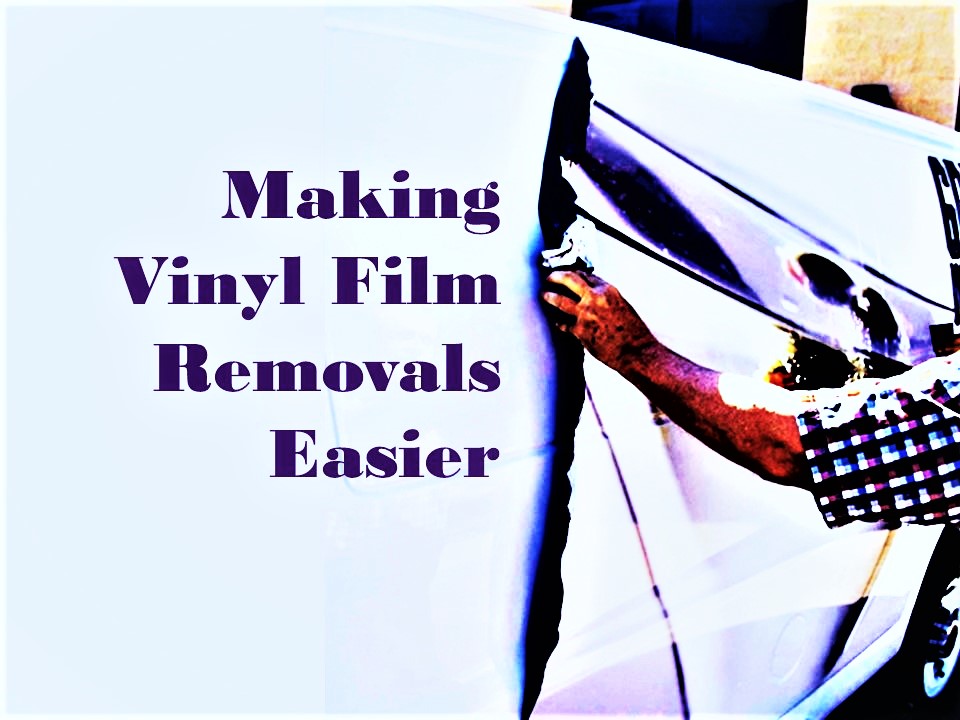
The first step in the removal process is to heat to the
graphics. Heat softens the facestock and its adhesive allowing the vinyl
to be more easily peeled from the surface.
By getting a large area hot you can peel larger pieces of film off at
one time.
If you are removing small letters, a small handheld
propane torch or industrial heat gun provides sufficient heat. If the graphics cover a large area, however,
you will need much larger torch, such as a weed burner. With an extra-long hose, the propane tank can
be left on the ground, safely leaving the scaffolding free of clutter.
Heat a large section of the truck surface for
approximately one minute. Keep the flame moving, so you do not to burn the
vinyl or substrate. Use caution when heating graphics on plastic substrates.
Heat can warp the substrate.
After heating, use a fingernail, a Teflon®-coated plastic
scraper, such as the Lil Chizler, or a plastic blade to lift the graphic’s
edge. When lifting the vinyl from the surface,
pull the film at a low angle (preferably less than 45°) close to the
work surface.
Whether you use a heat gun, propane torch or steamer, the
secret is to apply the correct degree of heat, something that can only be
learned by trial and error. If the vinyl is too hot or too cold, not only will
you leave the adhesive, but the film itself will break into little pieces. At the
optimal temperature, the film will remove more easily, in large pieces and you
will reduce the time it takes to perform the removal.
To remove the adhesive residue, after film removal,
requires the use of a chemical adhesive remover. Keep a variety of chemicals
with you, including PrepSol™, kerosene, lacquer thinner, xylene and a
citrus-based remover, when going on a removal job. What works wonders one day, may not work the
next.
Start with a less aggressive and safer remover, such as
Rapid Remover, before trying the
stronger and usually more toxic chemicals. Using this approach reduces the risk
of paint damage and minimizes any health hazards.
Before using removers, always test the chemical on an
inconspicuous spot of the substrate to make sure the remover doesn’t react with
the paint. Repainted vehicle surfaces are especially susceptible to damage from
chemical removers.
Spray the remover on the adhesive residue. Wait for the
chemical to react with the adhesive residue.
When the adhesive softens to a jelly-like substance, use a squeegee to
scrape the gel from the surface. Old rivet brushes can scrub adhesive off the
rivet heads.
Scraping off jellified adhesive is messy. To keep from spreading the mess all over the
substrate, mask off the area around the graphic with masking tape and kraft
paper or use RTape application tape. If
you are removing large areas of adhesive, some of it will likely end up on the
shop floor, so cover the area underneath your scaffold with brown kraft paper
or application tape to aid clean up.
In some cases, adhesive residue remains on the surface.
When this happens, spray the residue with remover, wait for the adhesive to
soften, and wipe the surface clean with rags or paper towels. Finish cleaning
the surface by wiping with isopropyl alcohol.
The surface must be perfectly clean before installing new
graphics. Applying new vinyl over old adhesive practically guarantees film
failure, because the adhesive will absorb the chemicals like a sponge. If the
new graphics are applied over the residue, the remaining remover will attack
the new adhesive. This can cause new vinyl to bubble, peel or fall off.
Cold removals
For
some removal jobs, using heat is impractical. For example, heating a window with
a torch can result in glass breakage. When you cannot use heat, try using razor
scrapers and plastic abrader wheels to aid film removal.
Visit My Vinyl Sign Techniques Community
Visit My Vinyl Sign Techniques Community

Vinyl Application Videos
Squeegee Technique. Nothing is more basic in vinyl application than the squeegee. But some squeegees work better than others. And there are right ways and wrong ways to use this simple tool. This video clip reviews squeegee selection, squeegee care and squeegee technique. Click to Link
Wet Applications. Dry applications are typically recommended for most vinyl applications. For those exceptions to the rule, this instructional video explains the right way to perform a wet application. Click to Link
Application of Window Graphics. Installing vinyl graphics on glass can be challenging, because the adhesive aggressively grabs onto this high energy surface. Repositioning graphics on window is generally difficult, if not impossible. This instructional video explains how to dry apply window graphics right the first time. It also describes the necessary steps required for surface preparation. Click to Link
Transferring Frosted Window Graphics Films. Because frosted window films are highly textured, transferring cut vinyl graphics can be problematic. This video provides direction in selection of the right application tape and how to apply these films quickly, easily and without problems. Click to Link
3-Step Surface Prep. This instructional video describes how to properly clean the surface of a vehicle before applying pressure sensitive vinyl graphics to a trailer or doing a full wrap of a car or van. This three step surface prep involves detergent washing, solvent cleaning and a final wipe down with IPA. Click to Link
Vinyl Application Over Rivets. Applying vinyl graphics on vehicle surfaces with rivets is challenging for most sign makers. Vinyl failures to these surfaces are all too common. This video demonstrates some tips and procedures, used by professional decal installers, which will make these demanding applications easier and more trouble-free. Click to Link
Vinyl Application to Corrugations. Learn how to apply vinyl graphics to corrugations in a relaxed state. Forcing films into the valleys of corrugations puts too much mechanical stress on the film. Sooner or later, the vinyl will lift or tent in valleys. Click to Link
Applying Air Egress Vinyls. Vinyl films with air egress release liners have almost eliminated bubbles and wrinkles from applied graphics. Air egress release liners with their highly textured surface structure are problematic. Not much will stick to these liners other than the vinyl film. At RTape our best premask solution for air egress liners is a special Conform® tape called 4761RLA. Click to Link

About Jim Hingst: After fourteen years as Business Development Manager at RTape, Jim Hingst retired. He was involved in many facets of the company’s business, including marketing, sales, product development and technical service.
Hingst began his career 42 years ago in the graphic arts field creating and producing advertising and promotional materials for a large test equipment manufacturer. Working for offset printers, large format screen printers, vinyl film manufacturers, and application tape companies, his experience included estimating, production planning, purchasing and production art, as well as sales and marketing. In his capacity as a salesman, Hingst was recognized with numerous sales achievement awards.
Drawing on his experience in production and as graphics installation subcontractor, Hingst provided the industry with practical advice, publishing more than 150 articles for publications, such as Signs Canada, SignCraft, Signs of the Times, Screen Printing, Sign and Digital Graphics and Sign Builder Illustrated. He also posted more than 325 stories on his blog (hingstssignpost.blogspot.com). In 2007 Hingst’s book, Vinyl Sign Techniques, was published. Vinyl Sign Techniques is available at sign supply distributors and at Amazon.
© 2016 Jim Hingst
Thank you for sharing such a nice information !
ReplyDeleteAdhesive Remover
For more information go at - http://adhesiveremove.blogspot.in/2015/06/precautions-to-be-taken-while-using.html